
Defender 11.4-Inch Pivi Pro Display Retrofit
The Short Answer
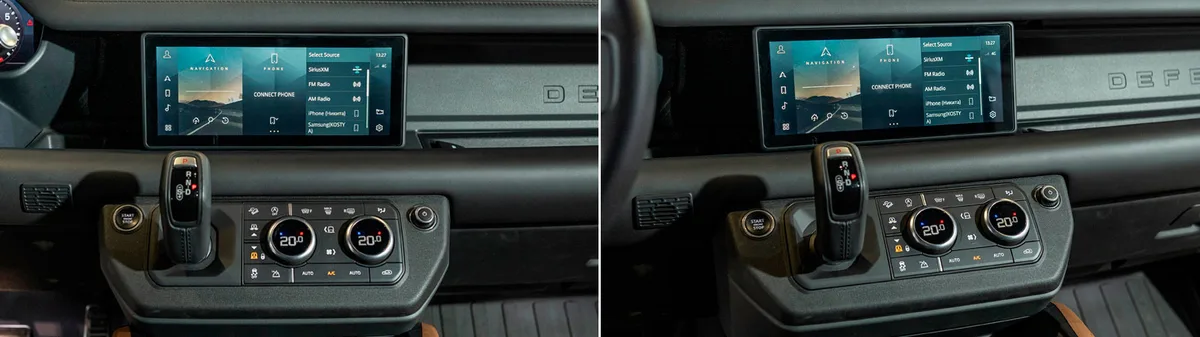
Yes — the Defender 11.4-Inch Pivi Pro display retrofit is one of the most requested L663 jobs: the infotainment can be upgraded to the 11.4-inch Pivi Pro touchscreen (and, on later cars, the 13.1-inch curved display is the related next step up). The job is part hardware swap, part software: the larger display and any associated trim go in physically, then the vehicle's configuration (CCF) must be updated and the infotainment module calibrated so the car recognises and drives the new screen. With the correct parts and TOPIx Cloud/CCF-level tooling it is a half-day job; without the software steps the new screen will not function correctly no matter how neatly it is fitted.
This guide covers parts, the physical install, the coding workflow and the pitfalls — the same workflow we use for remote activations on customer cars worldwide.
Which Defender Do You Have?
The L663 arrived in 2020 with Pivi Pro and the 11.4-inch touchscreen as standard on most trims — but early and base-spec vehicles left the factory with smaller or lower-specification infotainment, and market differences exist. From the 2025 model year the larger 13.1-inch curved-glass display became the flagship option; factory specifications are published on the official Land Rover Defender site.
Identify your starting point before ordering anything:
| Factory fit | Upgrade target | Complexity |
|---|---|---|
| 10-inch / early infotainment (2020–2021 base) | 11.4-inch Pivi Pro | Display + trim + coding |
| 11.4-inch Pivi Pro | 13.1-inch curved display | Display + surround + coding + calibration |
| Pre-Pivi infotainment (rare, earliest builds) | 11.4-inch Pivi Pro | Module + display + harness review |
Check your exact specification by VIN — the as-built record tells you what the car believes it has, which is what the coding step must reconcile. Full model coverage notes live on our Defender L663 vehicle page.
Parts Required
The retrofit needs more than the screen itself: trim, brackets and sometimes a different wiring variant depending on model year. Confirm every part against your VIN before ordering anything.
- 11.4-inch Pivi Pro touchscreen assembly — new or quality used (used units are viable; they carry no vehicle lock, but verify the part number matches your target spec).
- Correct trim/surround panel for the larger display — the dashboard aperture differs between screen sizes.
- Associated fixings and, where applicable, harness adaptors — connector families are consistent across L663 Pivi Pro variants in most cases, but verify against your VIN's build date.
- Battery support unit for the coding session — non-negotiable for any write on a DoIP vehicle.
The Physical Installation
Physically, the swap is careful trim work rather than mechanical surgery: dashboard panels come off, the old screen comes out, and the new unit seats in the same aperture with the updated surround.
- Power down properly. Ignition off, key away from the vehicle, let the buses sleep (10–15 minutes) before disconnecting anything. Connect your battery support unit for the reassembly phase.
- Remove the centre console trim around the existing display — trim tools only; the L663's panels are robust but the clips are not forgiving of metal levers.
- Unbolt and withdraw the existing display, disconnecting the harness connectors. Note connector orientation; photograph everything.
- Transfer or fit the surround for the larger screen, then connect and seat the new display.
- Reassemble in reverse order, checking panel gaps before final clip engagement.
- Do not panic at first power-up. The screen may show incorrect scaling, limited function or warnings until the software steps below are completed — the hardware is only half the job.
The Software Steps (Where Most DIY Attempts Fail)
The Defender must be told it now has the larger display: the CCF must be updated and the infotainment module calibrated, or the screen stays dark. In order:
- Connect a DoIP-capable interface and establish a Pathfinder session (background: our DoIP explained guide).
- Update the CCF/as-built configuration for the new display variant. On TOPIx Cloud this runs through the online configuration routines; engineering-level editors handle parameter-level changes where the online path does not offer the target configuration (see our CCF workflow guide).
- Flash the infotainment calibration matched to the new display — the IMC must run software built for the 11.4-inch panel's resolution and touch mapping.
- Run SOTA check to bring the newly configured system to current software level.
- Verify all functions: touch accuracy across the whole panel, cameras, audio, HVAC display, Bluetooth/CarPlay, and a full-module fault scan.
For workshops without standing TOPIx Cloud access, this is a natural remote job — the car arrives at your ramp with hardware fitted, and the configuration and calibration happen over an SX-LINK session.
Costs and Realistic Budget
Hardware pricing moves with the used market, but as a planning guide: the 11.4-inch assembly and trim typically land in the mid-hundreds of pounds used, more new; coding/calibration is either your own tooling time or a fixed-fee remote activation. Competitor installers quote £2,800–£3,700 fully fitted for screen upgrades on the L663 — a competent workshop or careful DIY owner can undercut that substantially, which is precisely why the Defender 11.4 inch Pivi Pro display retrofit is one of the most requested L663 jobs.
Common Pitfalls
Nearly every failed DIY attempt we are asked to rescue traces back to the same handful of mistakes — wrong trim variant, skipped CCF write, or a battery that sagged mid-flash. Learn from theirs.
- Buying by screen size instead of part number. Match the part number to your VIN's platform and build date.
- Skipping the calibration flash. The screen "works" but touch zones are wrong or cameras misbehave — the calibration is what aligns the panel.
- No battery support during coding. A sagging 12 V system mid-CCF-write is how infotainment modules end up in SOTA lockdown.
- Expecting plug-and-play. It is never plug-and-play on a DoIP vehicle. Budget the software time.
Sourcing, Compatibility and Splitting the Labour
A few practical notes from jobs we have supported: split the labour sensibly — owners handle the trim work, we handle the software remotely over a live session:
- Source by part number, always. Cross-reference your VIN's build date against the donor unit's part number. Breakers list screens by appearance; appearance is not compatibility.
- Used units are good value with two checks: the seller confirms the unit powers on and displays correctly, and the part number matches your target specification. Screens are not security-locked, so a clean used unit codes in exactly like a new one.
- Combine jobs while the trim is off. Camera-related features, dash-cam wiring and centre-console retrofits share the same disassembly — customers appreciate one labour bill instead of two.
- Split the job sensibly. Many owners and workshops fit the hardware themselves and book a remote session for the software half. That split plays to each side's strengths: your hands on the trim, our tooling on the configuration — and it converts the riskiest part (the coding) into a fixed-fee, documented procedure with verification at the end.
The same retrofit pattern applies across the L663 catalogue — audio upgrades, tow equipment, lighting and comfort features all follow the hardware-plus-CCF-plus-calibration shape. Once you have done one properly, the rest are variations on a theme.
Frequently Asked Questions
Can I fit the 11.4-inch Pivi Pro screen to any L663 Defender? In principle yes — the dashboard architecture accepts it — but the exact parts and coding path depend on your vehicle's build date and factory infotainment specification. Confirm by VIN before ordering; the as-built record determines which configuration change the software step must make.
Will the bigger screen work without coding? No. It may power on, but resolution, touch mapping, camera integration and connected services will be wrong or absent until the CCF is updated and the correct calibration is flashed. The software steps are roughly half the job.
Can I upgrade from the 11.4-inch to the 13.1-inch display? Yes, on compatible later-build vehicles — it is the same class of job (display plus surround plus coding plus calibration), with the 13.1-inch curved assembly and its specific trim. Verify harness and part-number compatibility by VIN, as the 13.1-inch was introduced with the facelift architecture.
Does a used display carry any security lock? Displays themselves are not immobiliser-paired the way a KVM or BCM is, so quality used units are a sensible cost saving. Verify the part number, insist on tested units, and still perform the full coding and calibration workflow.
Can the coding be done remotely? Yes — this is one of the most common remote activations we perform. You fit the hardware, we connect via SX-LINK with TOPIx Cloud access, update the configuration and calibration, and verify with you live. Typical remote session time is under an hour once connected.
Will this retrofit affect my warranty or insurance? A retrofitted display using genuine-specification parts and correct factory coding is configurationally identical to a car that left the factory with the option. That said, warranty decisions rest with your retailer and insurer — declare the modification to your insurer, and expect warranty claims on the infotainment system itself to be scrutinised on a warranty-period vehicle. On vehicles outside warranty, which is where most of these retrofits happen, it is a non-issue.
How long does the whole job take? For an experienced technician: two to three hours of trim and hardware work, plus under an hour of coding and calibration with everything prepared. First-timers should budget a full half day and take the trim slowly — the L663's interior is well engineered, and nothing needs forcing. The software session itself is the shortest part when parts and files were verified in advance; it is the unprepared version of this job that eats afternoons.
Get the Parts and the Coding
We supply Defender L663 display upgrade hardware with matched part numbers, plus remote coding and calibration via SX-LINK — worldwide. Order parts or book an activation at sx-tool.com/en/shop, and see the full L663 retrofit catalogue on our Defender vehicle page.