
Land Rover BECM Replacement: Technician Guide
The Short Answer
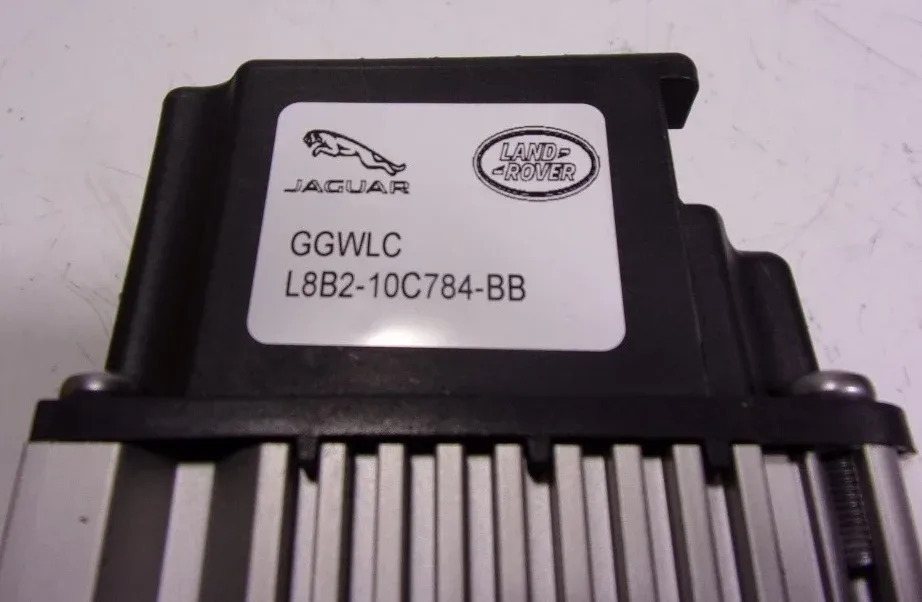
A Land Rover BECM replacement is a high-voltage job with three distinct phases: prove the module is actually at fault, exchange it safely under HV procedure, and program/commission the replacement so the vehicle accepts it. On P400e-era vehicles the BECM sits with the battery pack and requires proper HV isolation; programming is done with SDD or Pathfinder depending on platform, and used modules must be virginised before the car will accept them. Skipping any phase is how technicians end up with a car that still will not charge — or worse.
This is the workflow we use and support remotely, written for qualified technicians.
Before You Touch Anything: HV Safety
High-voltage work on a Land Rover PHEV is regulated workshop activity in most markets — treat the orange cabling and the battery area as live until you have proven otherwise with the correct procedure and test equipment.
Non-negotiables:
- Qualification. HV vehicle work requires appropriate training (e.g. IMI Level 3/4 in the UK or local equivalent). See the HSE guidance on electric and hybrid vehicles for the safety framework.
- Isolation procedure. Follow the JLR workshop-manual HV disable sequence: service disconnect, wait the specified capacitor discharge time, then prove dead with a rated tester at the designated test points.
- PPE and tools. Class 0 HV gloves with leather protectors, insulated tools, Cat III/IV meter. No exceptions on a P400e pack.
- 12 V discipline. Disconnect the 12 V battery as the procedure specifies — and note that on modern JLR, a 12 V disconnect triggers its own module wake/sleep consequences.
If you are not HV-qualified, stop here and sublet the physical work — diagnosis and programming can still be yours.
Confirm the Diagnosis First
Most "dead BECM" verdicts we review remotely turn out to be contactor faults, charger faults or software states — a Land Rover BECM replacement should only follow a proven diagnosis, never a guess from a warning light.
The confirmation sequence:
- Full module scan with SDD (pre-2017 platforms) or Pathfinder/TOPIx (newer), capturing all hybrid-system DTCs, not just the headline code.
- BECM data review. Contactor states, isolation resistance readings, cell voltage spread, charge-session logs. P0A1F and contactor-circuit codes point at the module; charge-port or EVSE codes point elsewhere.
- Rule out the cheap stuff. 12 V battery health, charger operation on a known-good EVSE, charge port lock actuator, software level.
- Guided pinpoint tests per the workshop manual for the specific DTC.
If the verdict is genuinely the BECM, decide new vs used vs repair — our what is a JLR BECM explainer covers the module itself, and the decision economics are below.
The Physical Exchange (P400e Example)
The BECM on the L405/L494 P400e mounts at the battery pack; access is from beneath with the vehicle lifted, after full HV isolation and 12 V disconnect.
In outline:
- HV isolation and prove-dead per the manual (see above).
- Raise the vehicle, remove the undertray and any shielding to expose the pack area.
- Disconnect coolant lines if the procedure requires (have a catch plan), then the HV interlocks and connectors in the specified order.
- Unbolt and remove the BECM. Note connector orientation and torque specs for reassembly.
- Fit the replacement module, reconnect in reverse order, refill/bleed coolant where applicable.
- Do not reconnect HV or 12 V until every connector is proven seated — an interlock left open will generate its own ghost faults.
New, Used or Repaired: Programming Differences
A replacement Land Rover BECM must be programmed to the vehicle regardless of source — the difference is how much preparation the module needs first.
| Source | Preparation | Programming |
|---|---|---|
| New module | None | "New module" routine via SDD/Pathfinder with online session |
| Used module | Virginise (reset VIN/learned data) with JET-level tooling | Then program as new; verify calibration by VIN |
| Repaired original | None if data intact | Often none — refit and clear codes; reflash if software corrupted |
Used modules are the value play — P400e BECMs are available from breakers at a fraction of new price — but only with proper virginising first. Our used module programming guide covers the virginise/clone workflow, and JET Master is the tooling that performs it. For the in-car programming steps on 2017-onwards vehicles, a TOPIx Cloud session is required.
Commissioning and Verification
Commissioning is where replacements succeed or fail — the module must be software-matched, configured and then proven under real charge and drive conditions before the car goes back.
The sequence:
- Program the module (new-module routine or post-virginise write) with battery support connected — programming discipline per our avoid bricking guide.
- Write/verify configuration against the VIN's as-built data.
- Re-enable HV per procedure and confirm ready-up.
- Charge test on AC — a full session start-to-finish, watching contactor behaviour and charge rate in live data.
- Road test in EV mode, verifying transitions and no derating.
- Final full scan — every module, not just the BECM — plus a coolant level check after thermal cycling.
Tools and Equipment You Actually Need
Beyond standard workshop kit, a Land Rover BECM replacement needs a short list of specialist equipment — most of it safety-related, none of it optional.
- HV PPE and test gear: Class 0 gloves with protectors, insulated tools, Cat III/IV rated meter for prove-dead.
- Diagnostics: JLR-capable tooling for pre- and post-job scans — SDD-era or Pathfinder/TOPIx depending on platform.
- Programming access: a TOPIx Cloud session for the online steps on 2017-onwards vehicles, or a remote programming session if you do not hold a subscription.
- Engineering tooling for used modules: virginising a donor BECM needs JET-level capability before the car will accept it.
- Battery support unit: mandatory for the programming phase — see our programming safety guide.
Can one workshop do the whole job without dealer involvement? Yes, completely: HV-qualified technician for the exchange, JLR-capable diagnostics for verification, engineering tooling for used-module preparation, and a TOPIx session (yours or a remote one) for programming. That is exactly the workflow independent specialists run daily — the dealer is one option among several, not a requirement.
Documentation and Warranty Notes for Workshops
HV work carries documentation obligations that ordinary repairs do not — and the workshops who treat the paperwork as part of the job are the ones protected when a vehicle returns with an unrelated fault three months later.
Record on the job card: who performed the HV isolation and with what qualification, the prove-dead readings, the donor or new module's part number and source, the programming session details, and the post-repair verification results. If a used module was fitted, its provenance belongs on the invoice. And be clear with the customer about warranty on the repair itself: a repaired or used BECM carries your warranty, not JLR's — state its terms in writing. None of this is bureaucracy; it is what turns a complex HV job into a defensible, repeatable workshop product.
Frequently Asked Questions
Do I need special training to replace a Land Rover BECM? Yes. The BECM is part of the high-voltage system; HV qualification (IMI Level 3/4 or local equivalent), insulated tooling and a proven isolation procedure are mandatory. The diagnosis and programming phases can be done without HV exposure once the module is accessible, but the exchange itself is HV work.
Can a used BECM be fitted to a P400e? Yes — a used BECM must be virginised (reset to factory state, clearing the donor vehicle's data) with engineering tooling, then programmed to the car with the normal new-module routine. Match the part number exactly and verify calibration by VIN.
What does Land Rover BECM replacement cost? New-module dealer replacement with programming is typically a four-figure invoice. A virginised used module plus programming, or a repair of the original module, usually lands far lower. Diagnosis before any decision is what protects the budget — many quoted "BECM failures" resolve as contactor or charger issues.
Does the BECM need coding after replacement? Yes. The module must be programmed and configured to the vehicle's VIN via SDD (older platforms) or Pathfinder with a TOPIx Cloud online session (2017-onwards). Without this step the vehicle will not accept the module and the HV system will not enable.
Can the diagnosis and programming be done remotely? Yes — diagnosis and the programming phase are routinely done via SX-LINK remote sessions: you handle the HV isolation and physical exchange, we handle the software. That split is the norm for workshops without standing TOPIx access.
How long does a full BECM replacement take? Budget it in phases: diagnosis one to two hours; the physical exchange a half day including HV isolation discipline and reassembly checks; programming and commissioning under an hour with everything prepared; verification charge cycle and road test another hour. Most workshops complete the whole job inside a working day when parts and access are staged in advance.
Support for Your Next BECM Job
SX-Tool supports BECM diagnosis, used-module commissioning and remote programming worldwide — via module repair services, remote sessions, and the JET/TOPIx tooling chain. Browse options at sx-tool.com/en/shop/ or read procedures at kb.sx-tool.com.