
JLR CAN Bus Diagnostics: Solving Network Faults
The Short Answer
JLR CAN bus diagnostics is a methodical process of elimination: a flood of U-codes means modules have stopped hearing each other, and the cause is almost always one of four things — a dead module, a wiring fault on the twisted pair, a gateway failure, or a terminating resistor problem. Network topology maps plus targeted electrical testing find the culprit without parts darts.
A modern Jaguar or Land Rover is a network of 50-plus computers talking over multiple CAN buses, and when communication breaks down the symptoms scatter across the whole car. This guide explains what U-codes actually mean and how professionals trace network faults. Newer DoIP-era vehicles add Ethernet to the picture — our JLR DoIP diagnostics explainer covers that layer.
What U-Codes Really Mean
A U-code is a communication complaint, not a condemnation — when one module logs "lost communication" with another, the reporting module is alive and the silent one, or the wiring between them, is where your attention goes. Reading U-codes as "replace the named module" is the single most expensive misinterpretation in network diagnostics.
This single insight prevents the most expensive mistake in network diagnostics: replacing the module that logged the code. U0100 — lost communication with the ECM — almost never means the scanner's target is faulty; it means the ECM has gone quiet. The realistic causes:
- The silent module has failed or lost power/ground. Check its feeds first — a blown fuse or corroded ground mimics module death perfectly.
- Wiring faults on the bus. Short to power, short to ground, or an open in the twisted-pair CAN High/CAN Low wires.
- A faulty gateway module failing to route messages between buses.
- Terminating resistor failure at one end of the bus, corrupting every signal on it.
Look up any code against our JLR DTC lookup to see which module relationship it describes before testing anything.
Start with the Network Topology
Professional network diagnosis begins with the topology map — knowing which modules live on which bus and which ones are silent turns a car-wide mystery into a one-bus, one-branch problem. Without the map you are testing blind; with it, the fault boundary usually announces itself within the first minute of the session.
Tools like JET Master or Pathfinder display the vehicle's network topology: the high-speed powertrain CAN, the medium-speed body CAN, and every module expected on each. Modules that respond appear; modules that don't are your suspects. This step matters because modern JLR vehicles run multiple independent buses — a fault confined to the body CAN produces a completely different symptom set than one on the powertrain CAN, and the topology view shows you the boundary instantly. Our remote diagnostic interface guide describes the hardware side of these sessions.
The Physical Testing Sequence
Once topology identifies the silent branch, electrical testing confirms whether the module or the wiring is at fault — a healthy CAN bus shows roughly 60 ohms across the pair and clean square-wave signals on a scope. The numbers do not lie, and they replace guesswork with evidence at the point where diagnosis usually gets expensive.
The methodical sequence:
- Power and ground at the silent module. Verify its feeds before condemning anything. Many "dead modules" are dead fuses.
- Bus resistance. With the battery disconnected, measure across CAN High and CAN Low: approximately 60 ohms indicates both 120-ohm terminating resistors are healthy; 120 ohms means one end is open; near-zero means a short.
- Oscilloscope inspection. At the silent module's connector, look for clean, mirrored square waves on CAN High and CAN Low. A distorted or flatlined signal localizes the fault to wiring or a specific module dragging the bus down.
- Divide and conquer. Disconnecting modules one at a time on a corrupted bus reveals the one pulling it down — a classic technique for shorted transceivers.
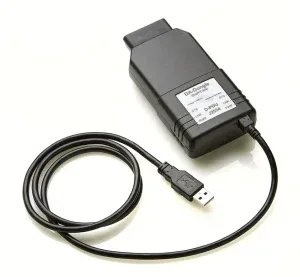
For legacy CAN-era vehicles, the SX-CAN engineering tool provides deeper access to these networks.
Common JLR Network Fault Patterns
Certain network fault patterns recur across the JLR fleet — water ingress at known loom points, aftermarket accessory taps into CAN wiring, and module failures that drag an entire bus down — and recognizing the pattern shortens the diagnosis dramatically.
The greatest hits, from workshop experience:
- Water in the loom. Blocked drains and failed seals let moisture track into connectors and splice points; corrosion on CAN pins produces intermittent, weather-correlated U-code storms.
- Aftermarket taps. Trackers, dashcams and remote starters spliced into bus wiring are a classic source of resistance faults and signal corruption — always ask what has been added to the car.
- The drag-down module. One module with a shorted transceiver silences its whole bus; every module on it appears dead until the offender is unplugged.
- Post-repair ghosts. U-codes stored during a flat battery or a disconnected module persist after the cause is gone — clear everything and re-scan before condemning anything.
Each pattern has a characteristic signature in the topology view and the multimeter readings, which is why experienced network diagnosis is measured in hours rather than days.
Why Generic Tools Fail Here
Generic OBD scanners report U-codes but cannot show you the network — no topology, no per-module presence, no guided isolation — so the technician is left guessing among dozens of modules and metres of twisted pair. The scanner tells you a conversation failed; professional tooling shows you who stopped talking, on which bus, and often why.
JLR-level tooling changes the game at three points: it maps expected versus actual module presence; it runs guided network tests that walk the diagnostic ladder in the right order; and it distinguishes a module that has failed from one that is merely unpowered. Combined with a multimeter and a scope for the physical layer, that is the complete professional stack. When the vehicle is not in your bay, the entire software side of this process runs remotely — see SX-LINK remote diagnostics.
There is one more practical habit worth adopting: document as you go. Network faults are often intermittent, and a clear record of which modules were silent, what the resistance measured, and what changed after each step turns a recurring ghost into a solvable case — for you, or for the specialist you call in. Intermittent faults punish vague memory and reward boring notes.
Frequently Asked Questions
Can I drive with active U-codes? It depends entirely on which bus is affected. A body-bus communication fault may be an annoyance; a powertrain-bus fault can disable ABS, stability control or the engine itself. Treat multiple simultaneous U-codes as a stop-and-diagnose condition.
What does a 60-ohm reading tell me? Two healthy 120-ohm terminating resistors in parallel read as ~60 ohms across the bus. Significantly different readings point to a failed resistor, an open wire, or a short — each with its own characteristic value.
Why did my car show dozens of U-codes after a flat battery? Low voltage during cranking causes modules to brown out and log communication faults en masse. Charge the battery properly, clear all codes, and re-scan — genuine network faults return immediately, while voltage-event ghosts stay gone.
Can one faulty module kill a whole bus? Yes. A module with a shorted CAN transceiver can drag down the entire bus, making every module on it appear silent. The disconnect-one-at-a-time test isolates the offender.
Do I need an oscilloscope for CAN diagnosis? For confirmation, ideally yes — resistance checks find opens and dead shorts, but signal integrity problems and marginal faults only reveal themselves on a scope. Many faults are solved with topology plus a multimeter alone, though.
Trace It, Don't Guess It
Network faults reward method and punish guesswork — every hour spent swapping parts on a hunch is an hour the topology map would have saved. SX-Tool provides the tooling, the topology access and — via remote diagnostics — the expert eyes. Browse the toolkit at sx-tool.com/en/shop/.